
The second first-steps guide. This is the short path — enough to get one floor working end to end. The full detail for each stage lives in the Sites, zones & floorplans area, and you should read those before you trace a whole estate.
MassComs supports your organisation’s safety plan. It does not replace authorised instructions, trained judgement or emergency services.
Before you start
Have these ready.
- A site with at least one building and one floor — see First steps 1.
- The current approved plan for that floor as PNG, JPG, PDF or TIFF.
- Someone who knows the building well enough to say whether a route is walkable.
- 01
Open the floorplan builder for a specific floor
From Admin, open the floorplan tools and select the site, building and floor. The builder is always scoped to one floor — if the selector is empty, the floor record does not exist yet and you need to go back to Sites.
Confirm it workedThe header should name the floor you intend to trace before you upload anything. Uploading against the wrong floor is the most common wasted hour in setup.
- 02
Upload the plan
Use Upload floorplan and choose the image or PDF. PDFs and TIFFs are rasterised in the browser; large images are downscaled so the longest edge is 2048 pixels before anything is sent for analysis.
That 2048-pixel ceiling is why a photograph of a printed plan performs badly: after downscaling, room labels that were already marginal become unreadable to the trace. Export from the CAD or PDF source when you can.
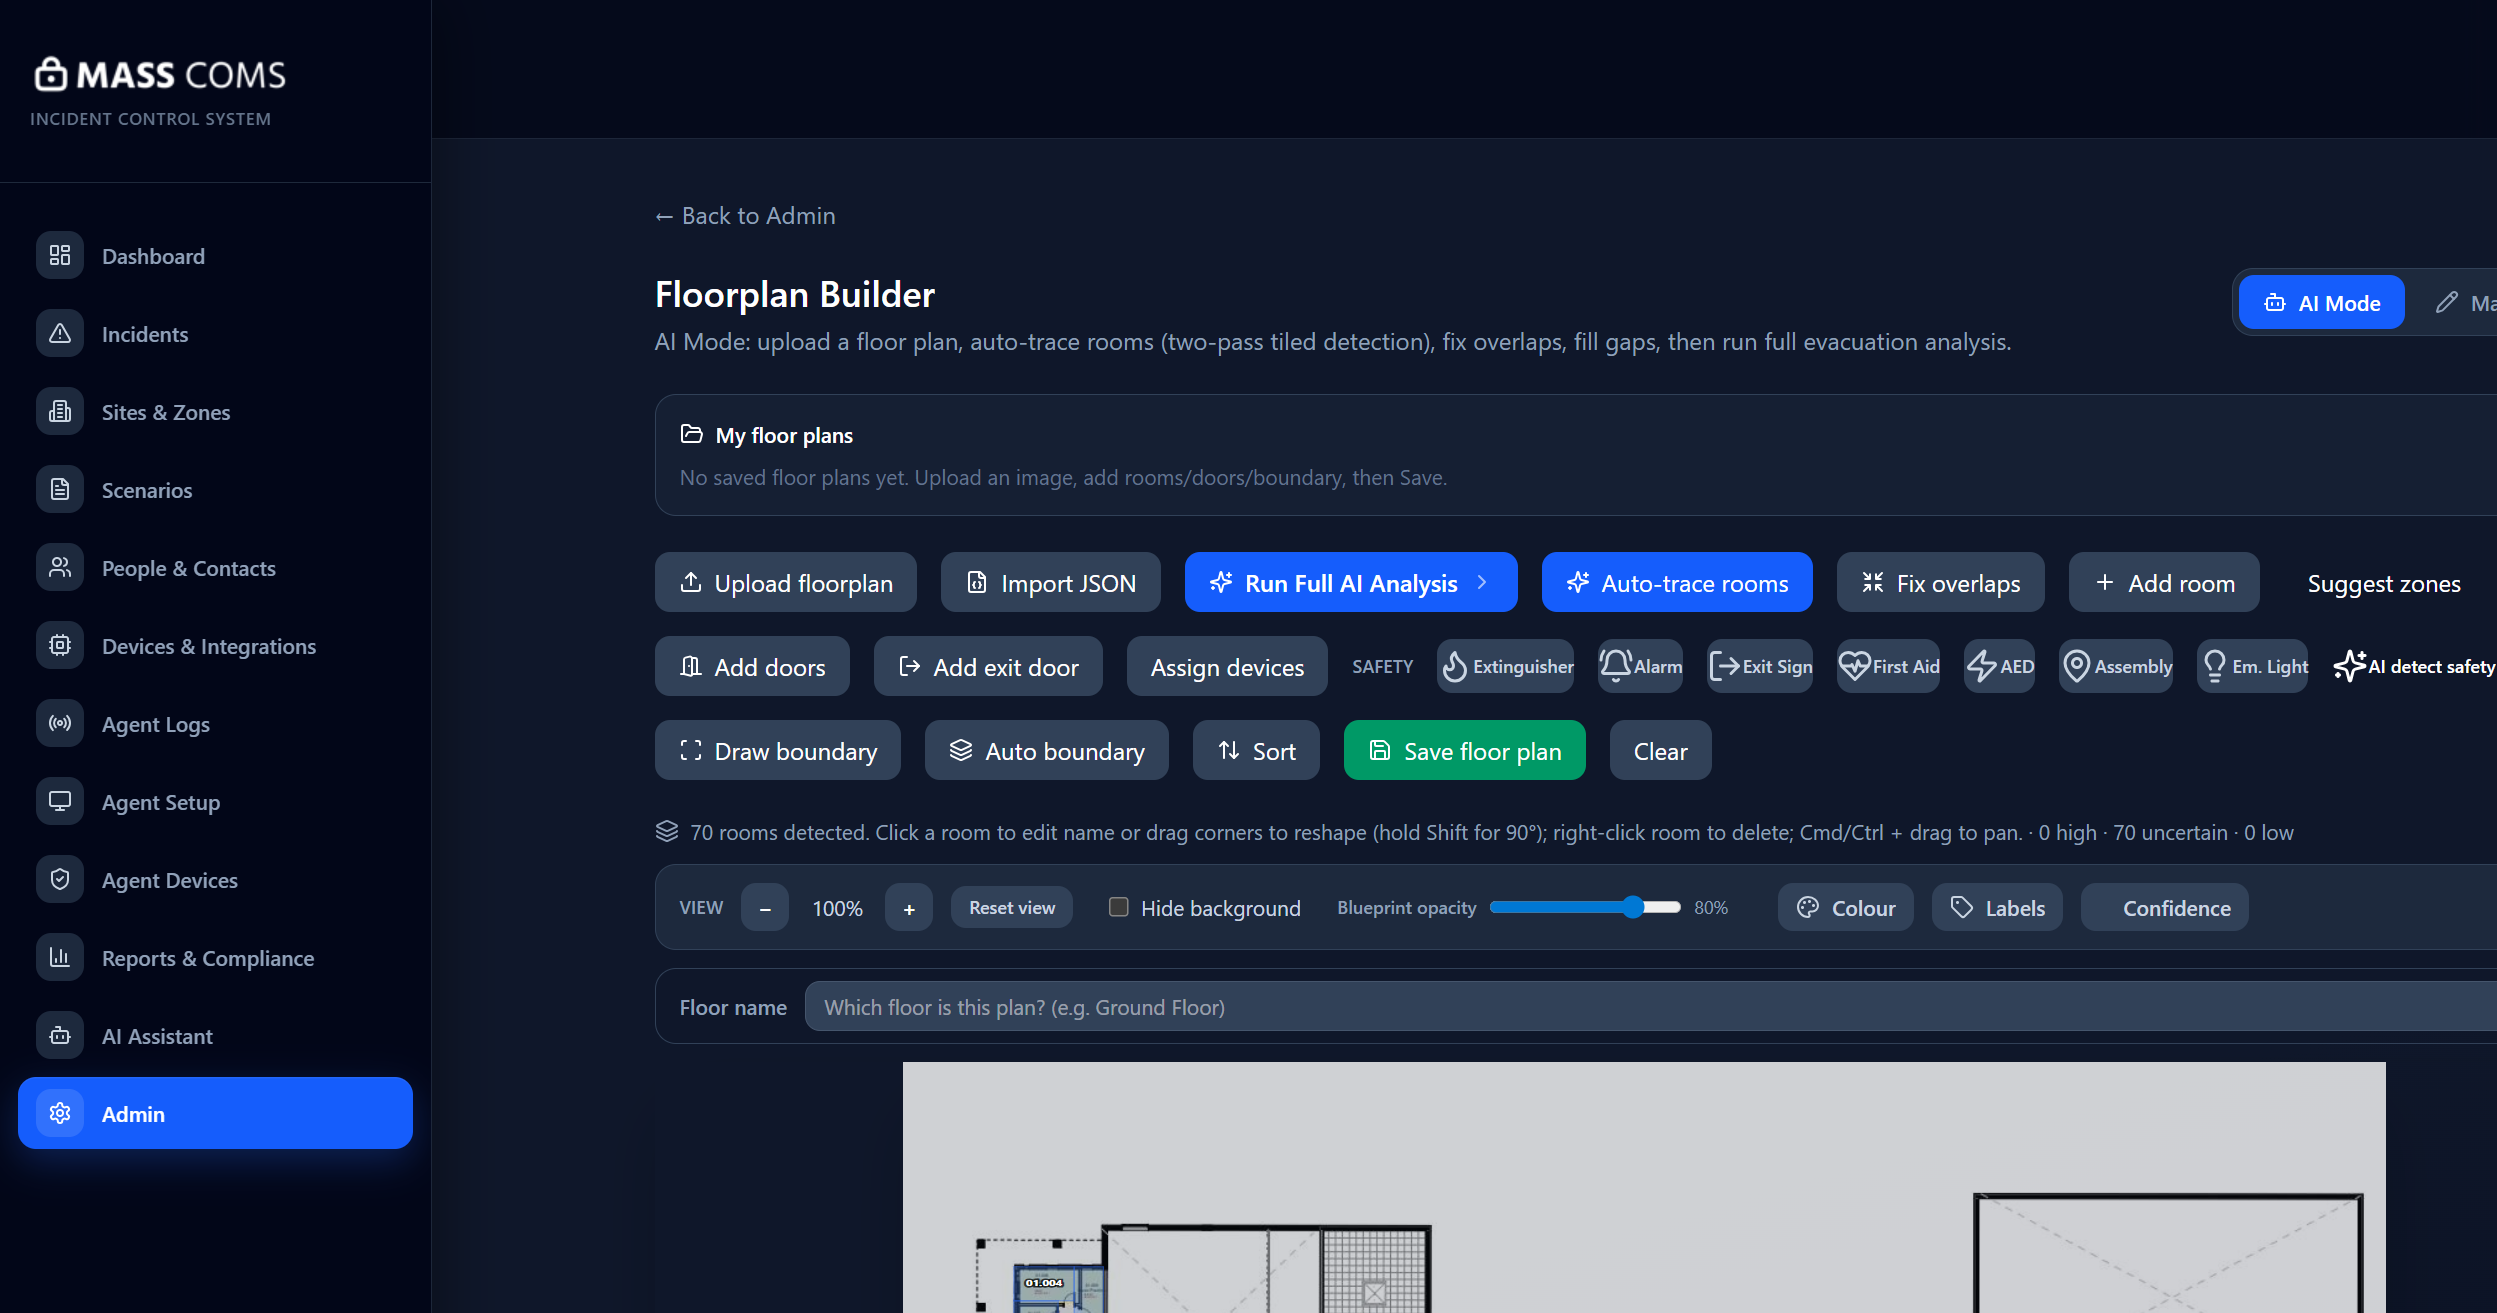
Floorplan builder with a traced planMassComs floorplan builder showing an uploaded plan with detected room boundaries. - 03
Detect rooms, then correct them
Run Detect rooms to trace room boundaries. Review every result: use Fix overlaps to clip rooms so no two overlap, Fill gaps to close small holes between them, and Name unnamed rooms to resolve the ones the trace could not label.
- Confidence badges mark rooms the trace was unsure about — start there.
- Draw room lets you add a space the trace missed entirely.
- Delete anything the trace invented, such as a title block or a legend read as a room.
Detected geometry is a draft. Rooms that are wrong here produce wrong "You are in …" labels and wrong routes on every device.
- 04
Add the boundary, doors and exits
Use Draw boundary (or Auto boundary) to set the usable building outline, then add doors, fire exits and staircase entrances. Doors are what turn a set of disconnected rooms into a graph a route can be computed across.
Door and exit detection is a separate pass — it runs from Run Full AI Analysis, not from Detect rooms. If you only ran Detect rooms, you have no doors yet.
- 05
Assign zones and set an assembly point
Assign each room to a zone, then give the zone an assembly point. A zone with no assembly point shows Zone has no assembly point set and cannot resolve a muster destination for the people in it.
Confirm it workedNo room should be left showing Not in a zone, and no zone should be left showing no assembly point.
- 06
Preview routes and have a person check them
Preview the route from several representative rooms — one near an exit, one deep inside the floor, one behind a door the plan may have got wrong. Walk the doubtful ones in the real building.
Sign off is a human act. Do not treat a plan as complete because the builder stopped showing errors.
- 07
Save the plan
Save floor plan writes the geometry, rooms, zones and overlays. Saved plans can be reopened and edited; you do not have to finish in one sitting.
Troubleshooting
When it does not go to plan.
| Symptom | Usual cause | Fix |
|---|---|---|
| Detect rooms returns nothing usable. | The source is a photograph, a scan at an angle, or a plan whose walls are thin or dashed. | Re-export from the original CAD/PDF at higher contrast, or draw the rooms by hand with Draw room. A hand-drawn floor is better than a wrong traced one. |
| Rooms overlap after tracing. | Adjacent tiles each claimed the same space near a tile seam. | Run Fix overlaps, which clips rooms so no two overlap and removes duplicates. |
| A route ends at the wrong exit. | A door is missing, or a fire exit was traced as an ordinary door. | Add the missing door connection and re-mark the correct one as a fire exit, then preview again from the same room. |
Good to know
Small details that prevent big confusion.
- Every route feature in the product reads this geometry: mobile exit routes, signage takeover, Agent overlays and the assembly direction map.
- Re-verify after building works, a refurbishment or a plan replacement. Nothing re-checks it for you.
- You can import previously exported geometry as JSON if you are rebuilding a floor you have traced before.
Was this guide clear?