
The floorplan builder is the most consequential screen in MassComs. Everything visual that a person is shown during an incident — the room they are told they are in, the route they are told to take, the exit they are pointed at — is computed from what you produce here. This guide covers the whole workflow properly.
MassComs supports your organisation’s safety plan. It does not replace authorised instructions, trained judgement or emergency services.
Before you start
Have these ready.
- A site with a building and a floor already created.
- The current approved plan for that floor, exported from its source rather than photographed.
- The sites.manage permission.
- Access to someone who knows the building, for the verification step at the end.
- 01
Prepare the source drawing before you upload it
The quality of everything downstream is set here. MassComs downscales any uploaded image so its longest edge is 2048 pixels before analysis, and re-encodes it as JPEG — so detail that is marginal in your source is gone before the trace ever sees it.
That single constraint explains most poor traces. A 6000-pixel-wide architectural PDF exported cleanly survives the downscale with readable room labels. A phone photograph of a printed plan on a wall does not: after downscaling it has perspective distortion, uneven lighting and labels a few pixels tall.
- Export from the original CAD or PDF at the highest resolution available.
- Crop to the floor itself. Title blocks, legends and revision tables get traced as rooms.
- Flatten layers that add clutter — furniture, electrical, ductwork — and keep walls, doors and room labels.
- Remove annotations that should not be visible to general users, such as security equipment positions or safeguarding notes.
- Prefer a plan where walls are solid lines. Thin, dashed or hatched walls trace badly.
Whatever you upload can end up visible to people during an incident. Treat the upload as a publication step and strip anything sensitive first.
- 02
Open the builder against the correct floor
Open the floorplan tools from Admin and select site, building and floor. The builder is always scoped to one floor. If a floor is missing from the selector, it does not exist yet — go back to Sites and add it.
On an organisation with nothing traced yet, My floor plans reads No saved floor plans yet — upload an image below, add rooms/doors/boundary, then Save. Once plans exist, that panel lists them so you can reopen one and keep editing.
Confirm it workedThe header names the floor you intend to work on before you upload anything.
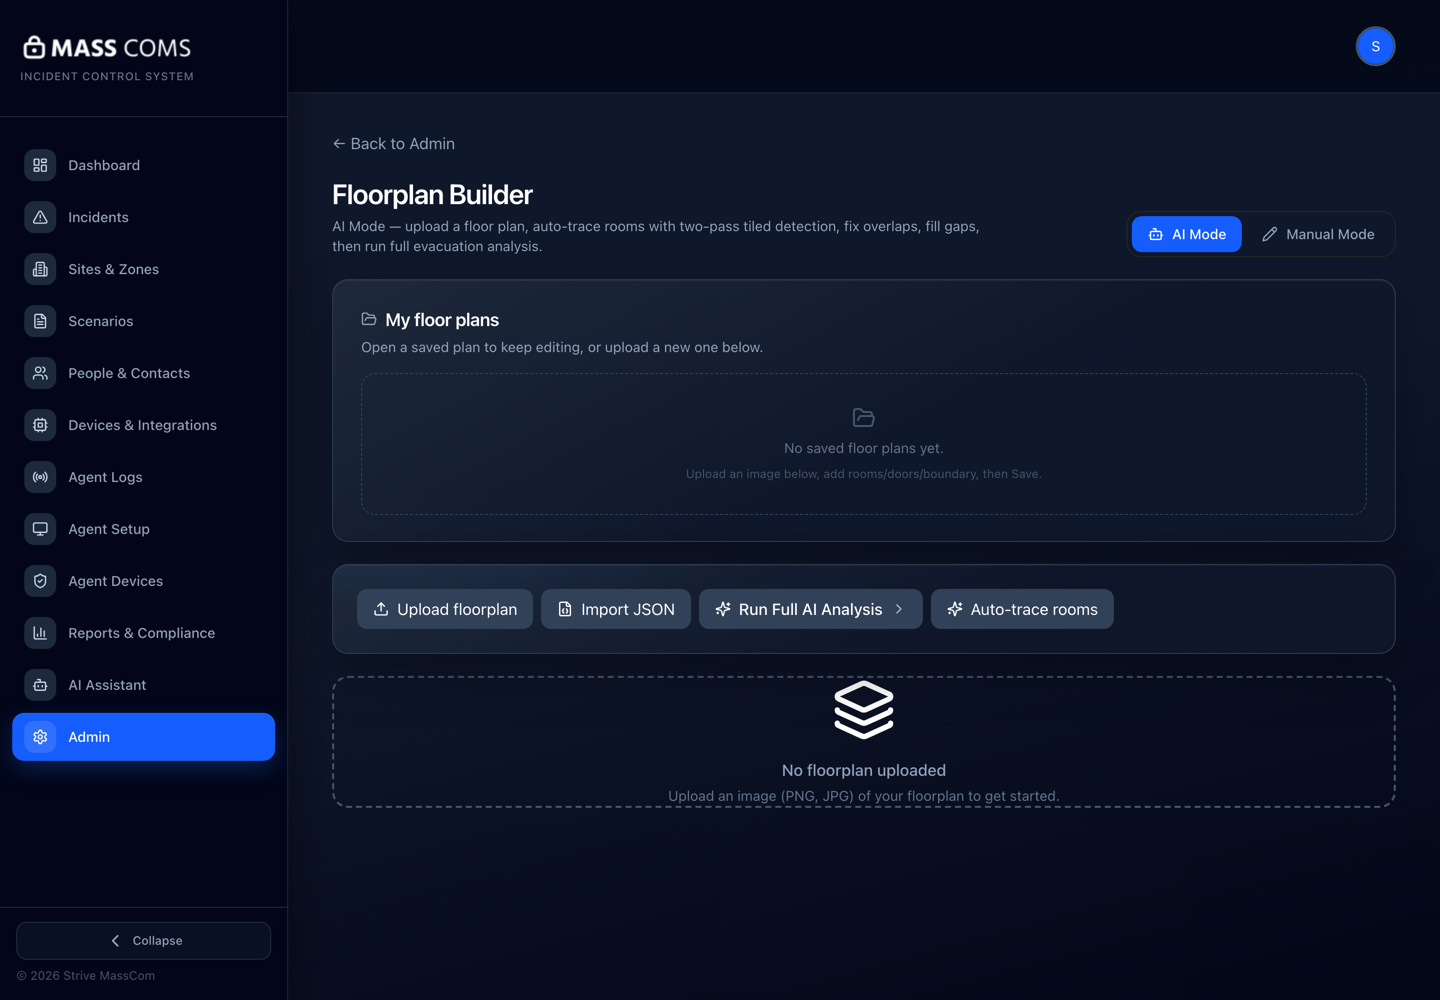
Floorplan Builder before any plan is uploadedMassComs Floorplan Builder empty state showing AI and Manual mode, My floor plans, Upload floorplan, Import JSON, Run Full AI Analysis and Auto-trace rooms. - 03
Choose AI Mode or Manual Mode
The builder has two modes, switched at the top right. AI Mode uploads a plan, auto-traces rooms with two-pass tiled detection, fixes overlaps, fills gaps and can then run a full evacuation analysis. Manual Mode is for drawing rooms, placing safety equipment and creating zones by hand.
Use AI Mode for any real architectural plan. Use Manual Mode when the source is unusable — a hand-sketched layout, a heavily annotated scan, or a space with no drawing at all. A carefully hand-drawn floor beats a badly traced one every time, and the two modes edit the same underlying geometry, so you can start in one and finish in the other.
Field or control What it does AI Mode Tiled auto-trace plus the full analysis pipeline. Requires an uploaded image and is unavailable in demo mode. Manual Mode Draw rooms, boundaries, doors and zones by hand. Always available, and the fallback when a trace cannot be trusted. 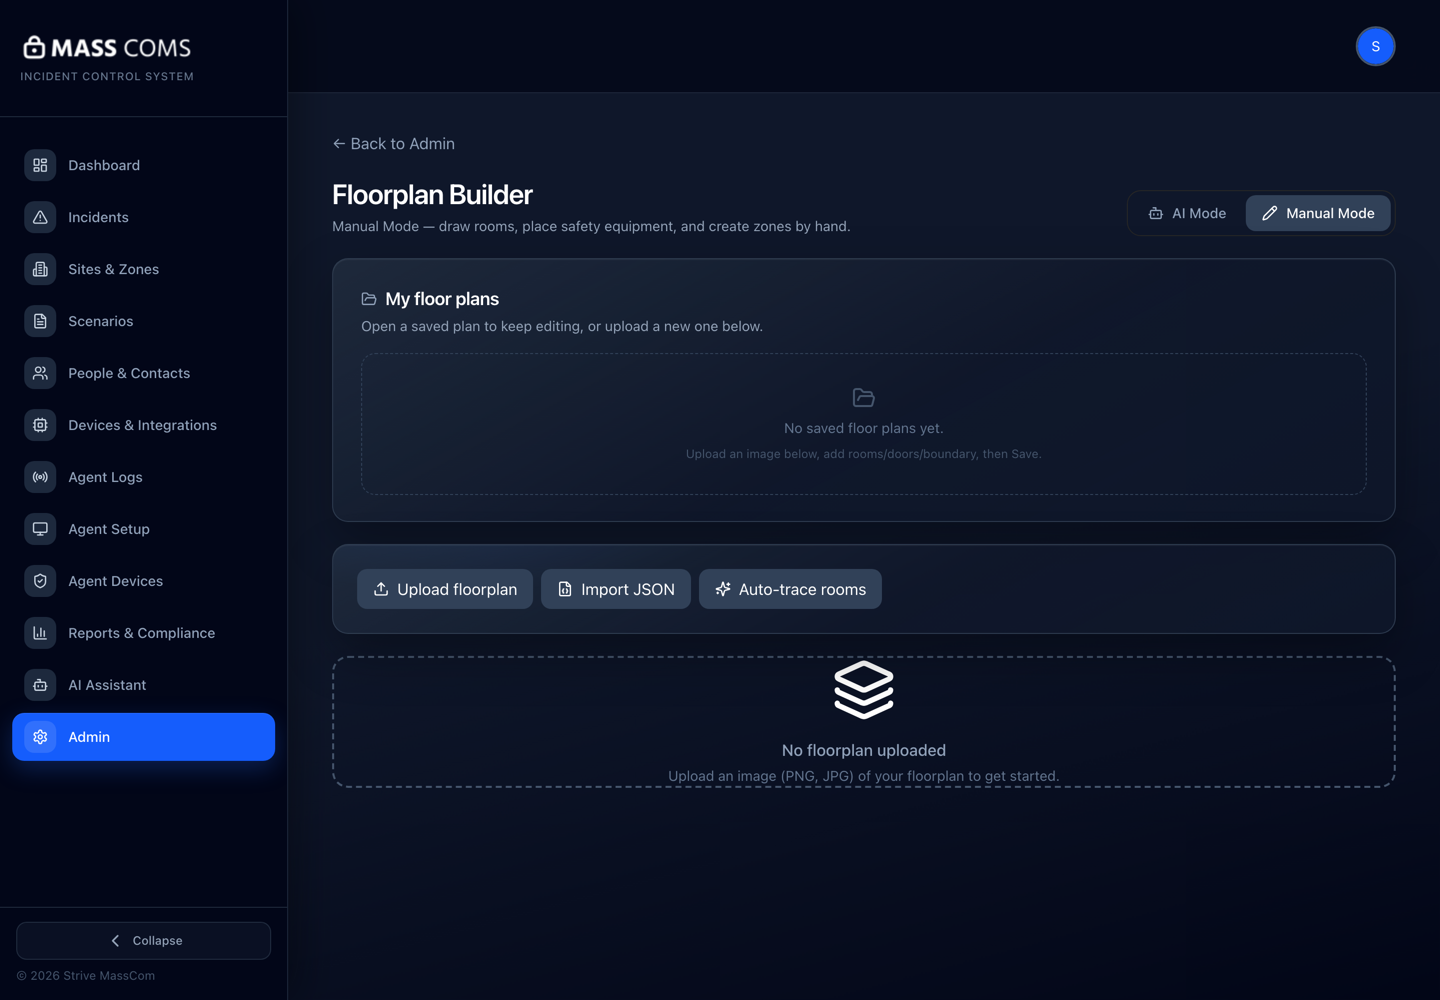
Manual ModeMassComs Floorplan Builder in Manual Mode, for drawing rooms, placing safety equipment and creating zones by hand. - 04
Upload the plan
Use Upload floorplan. Accepted formats are images, PDF and TIFF — the file picker accepts image/*, .pdf, .tif and .tiff. PDFs and TIFFs are rasterised in the browser before anything else happens.
After upload the plan appears on the canvas with pan and zoom. The Blueprint settings control how it is displayed while you work — Opacity and Stroke change how strongly the underlying drawing shows through your traced geometry, which matters a great deal when you are checking whether a traced wall actually sits on a real wall.
Field or control What it does Upload floorplan Accepts image files, PDF, TIF and TIFF. Large images are downscaled to 2048px on the longest edge. Import JSON Restores previously exported geometry. Use this to rebuild a floor you have traced before, or to move a traced floor between environments. Opacity / Stroke Blueprint display controls. Lower the opacity of your traced shapes to check them against the drawing underneath. 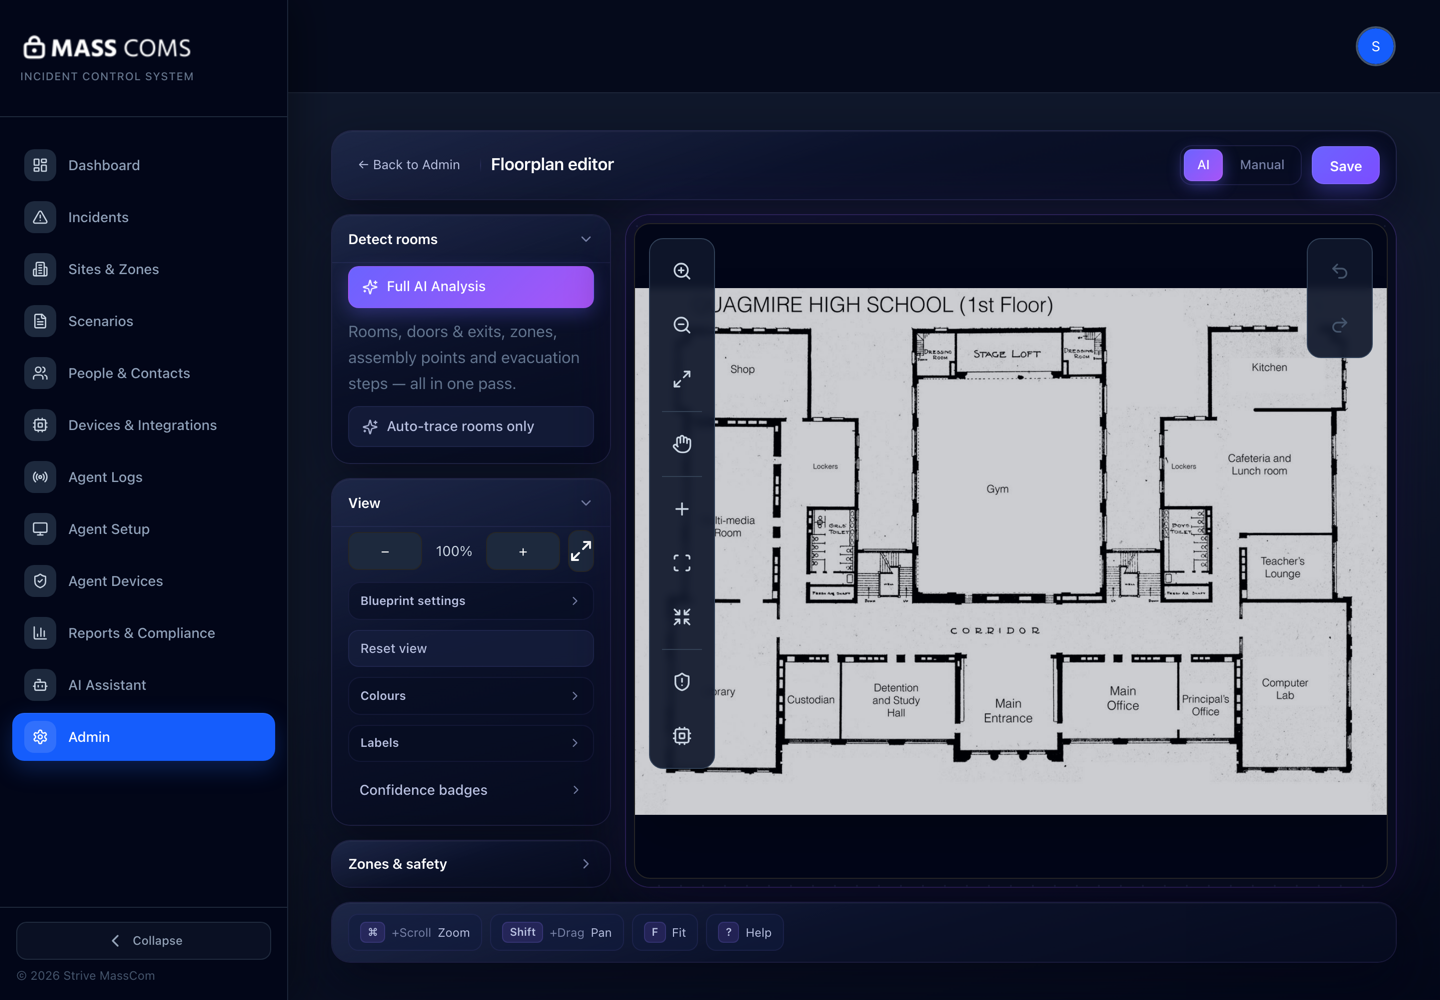
The floorplan editor with a plan loadedMassComs floorplan editor showing an uploaded school floor plan on the canvas with the Detect rooms and View panels on the left. - 05
Learn the canvas controls before you start editing
Once a plan is loaded the builder becomes the Floorplan editor: a canvas with a tool rail down its left edge, collapsible panels beside it, undo and redo at the top right, and Save at the top of the page.
The editor advertises its own shortcuts along the bottom of the canvas, and learning them makes the difference between a comfortable afternoon and a frustrating one — you will be zooming and panning constantly while checking traced walls against the drawing underneath.
Field or control What it does ⌘ + Scroll Zoom the canvas. Shift + Drag Pan the canvas. F Fit the whole plan to the canvas. ? Open the editor's own help. ⌘Z / ⌘⇧Z Undo and redo, keeping the last 50 actions. History does not survive leaving the page. Right-click a room for its actions, and drag its corners to reshape it. More than one Agent can share a room, so you do not need a room per device.
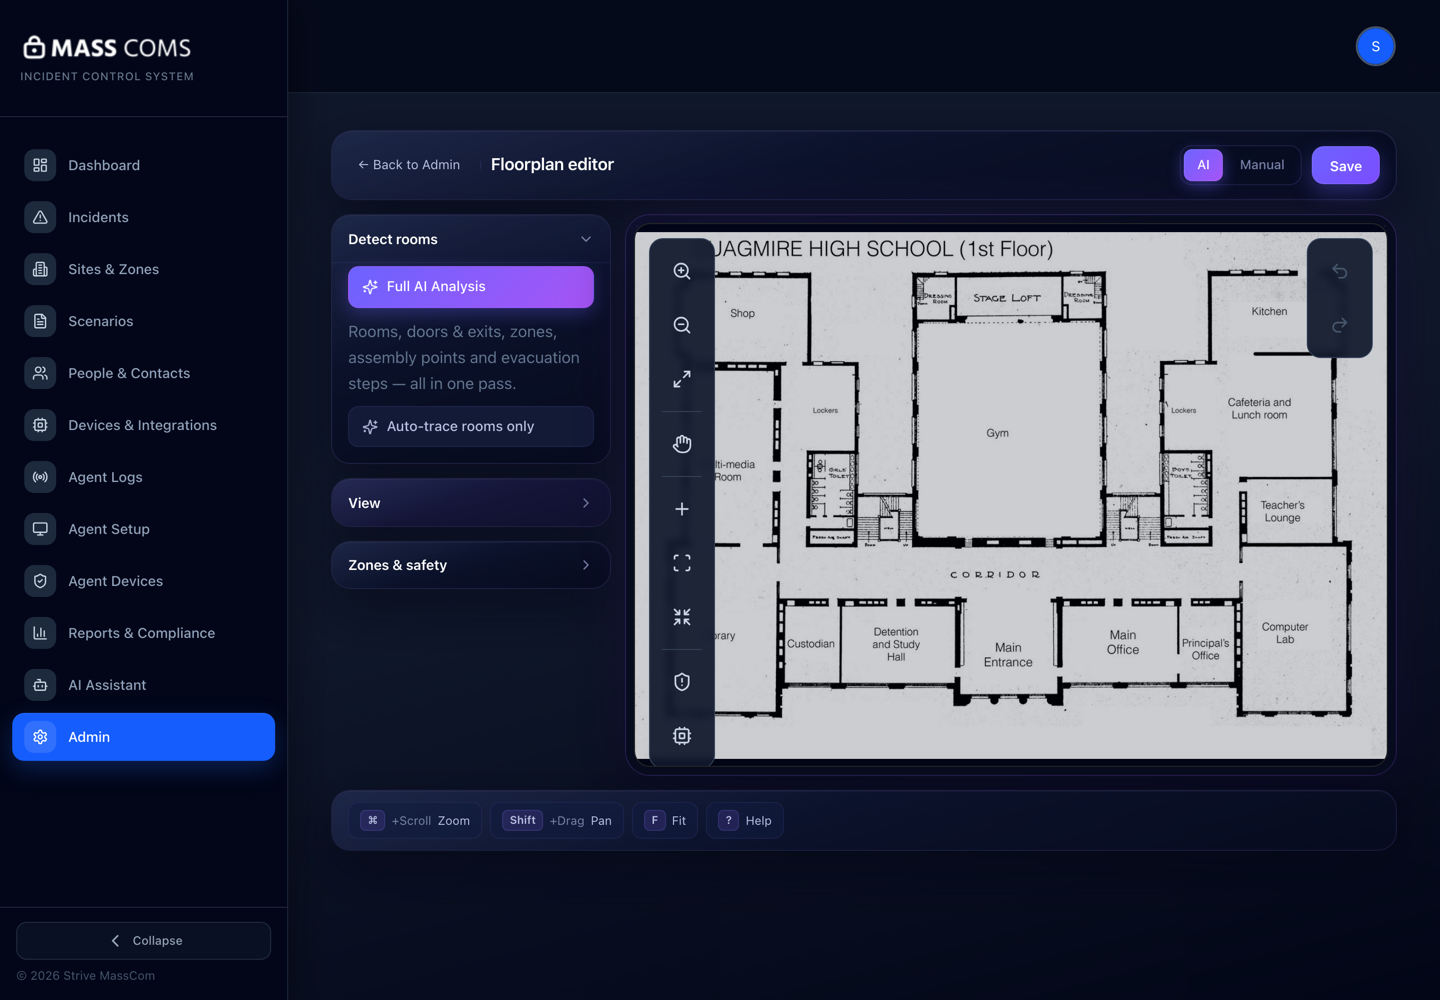
View panel and blueprint controlsMassComs floorplan editor View panel showing zoom, Blueprint settings, Reset view, Colours, Labels and Confidence badges. - 06
Trace the rooms
Run Auto-trace rooms only. The image is split into tiles, each tile is analysed separately, and the results are stitched back into one set of room polygons. Tiles that fail are retried automatically with a short stagger before the result is assembled.
Tiling is why detection copes with large plans at all, and also why the seams between tiles are where errors cluster. Two adjacent tiles can each claim the same corridor, producing overlapping rooms along a straight line through the plan. That specific pattern is what Fix overlaps exists for.
Where the computer-vision service is available, tile boundaries are chosen from the drawing's own geometry rather than a fixed grid, which reduces seam artefacts. When it is not available the builder falls back to fixed tile bounds — you may see more seam-line overlaps in that case, but the fix is the same.
Detection runs in two passes per tile: a box pass that finds room rectangles, then a label pass that reads the room names off the drawing. On a clean single-floor school plan that produces something like twenty rooms with real names — Gym, Library, Main Office, Teacher's Lounge — rather than Room 1 to Room 21. If you get correct shapes with generic names, the label pass is what failed, usually because the source was too low-resolution to read.
Confirm it workedCompare the room count against what you know the floor contains — the editor shows it as a badge beside the title. A number wildly higher than reality usually means legends or furniture were traced; wildly lower means the walls were too faint.
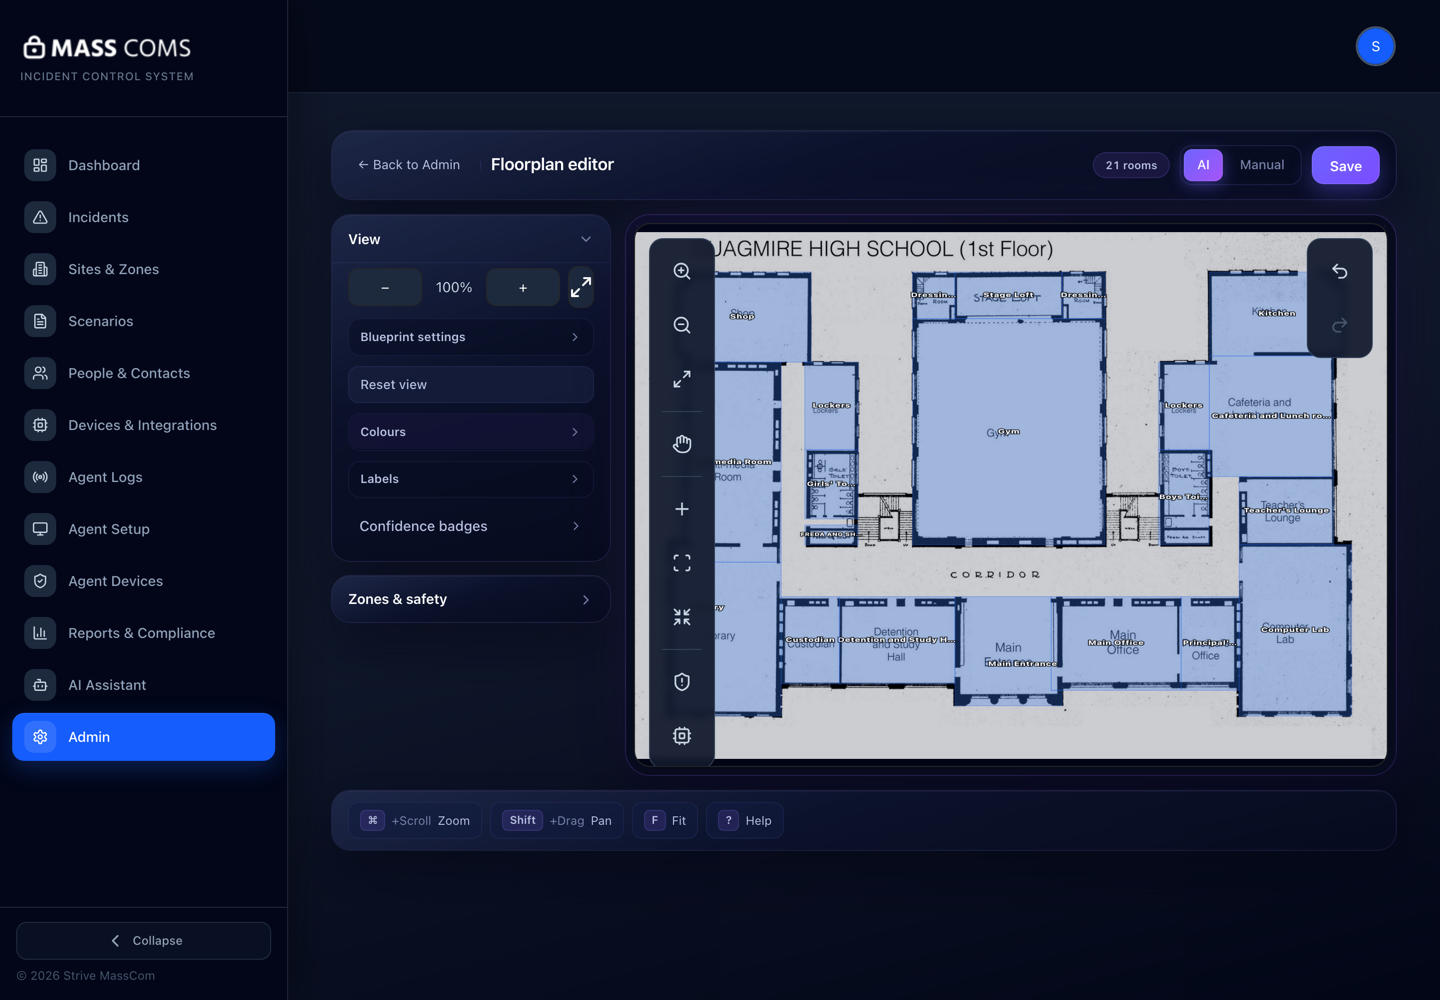
A traced floorMassComs floorplan editor after auto-trace, showing 21 detected rooms shaded over a school floor plan with their names read from the drawing. - 07
Correct the geometry with the cleanup tools
The cleanup tools are not optional polish — they are the step that turns a draft trace into usable geometry. Work through them in order.
- Delete anything that is not a room: title blocks, legends, north arrows, key tables.
- Check corridors specifically. They are long, thin and the most common casualty of tile seams.
- Zoom in on any room whose boundary looks straighter than the building.
Field or control What it does Fix overlaps Clips rooms so no two overlap, and removes duplicates. Run this first, before anything that depends on room boundaries. Fill gaps Closes small holes between adjacent rooms. Gaps break route continuity even when they are too small to see at normal zoom. Name unnamed rooms Resolves rooms the trace could not label. Every room should end with a name a human would recognise. Draw room Adds a space the trace missed entirely. Adjacent rooms Shows which rooms the builder considers connected — the relationship route calculation walks along. Confidence badges Marks rooms the trace was unsure about. Start your review here rather than at the top-left of the plan. Detected geometry is a draft until a person has checked it. A wrong room boundary produces a wrong "You are in …" label on somebody's phone during a real event.
- 08
Set the building boundary
Use Draw boundary to trace the usable building outline by hand, or Auto boundary to create a boundary box around all rooms. Edit boundary adjusts an existing one.
The boundary tells the builder what counts as inside. Routes are computed within it, and an over-generous boundary can produce routes that appear to cross open ground that is actually a wall.
- 09
Run the full analysis, or continue by hand
In AI Mode, Full AI Analysis executes the complete pipeline in sequence — the panel describes it as rooms, doors and exits, zones, assembly points and evacuation steps, all in one pass. It reports each stage as it goes, so you can see where it is and where it fails.
Once a plan has already been analysed, the Zones & safety panel offers Re-run Full AI Analysis, which regenerates rooms, zones, assembly points and evacuation steps from scratch. That is a destructive re-run, not a top-up — anything you corrected by hand goes with it.
- Tracing rooms
- Drawing boundary
- Filling gaps
- Detecting safety equipment
- Detecting doors and exits
- Grouping into zones
- Placing assembly points
- Writing evacuation instructions
Door and exit detection runs only in this full pipeline — Auto-trace rooms only does not produce doors. If you traced rooms and wondered why there are no doors, this is why.
Everything this pipeline produces is a proposal. Suggested zones are explicitly labelled AI suggested zones — review before applying, and generated evacuation instructions must be read as if you were the person following them. Re-running the full analysis after you have corrected the geometry will discard those corrections.
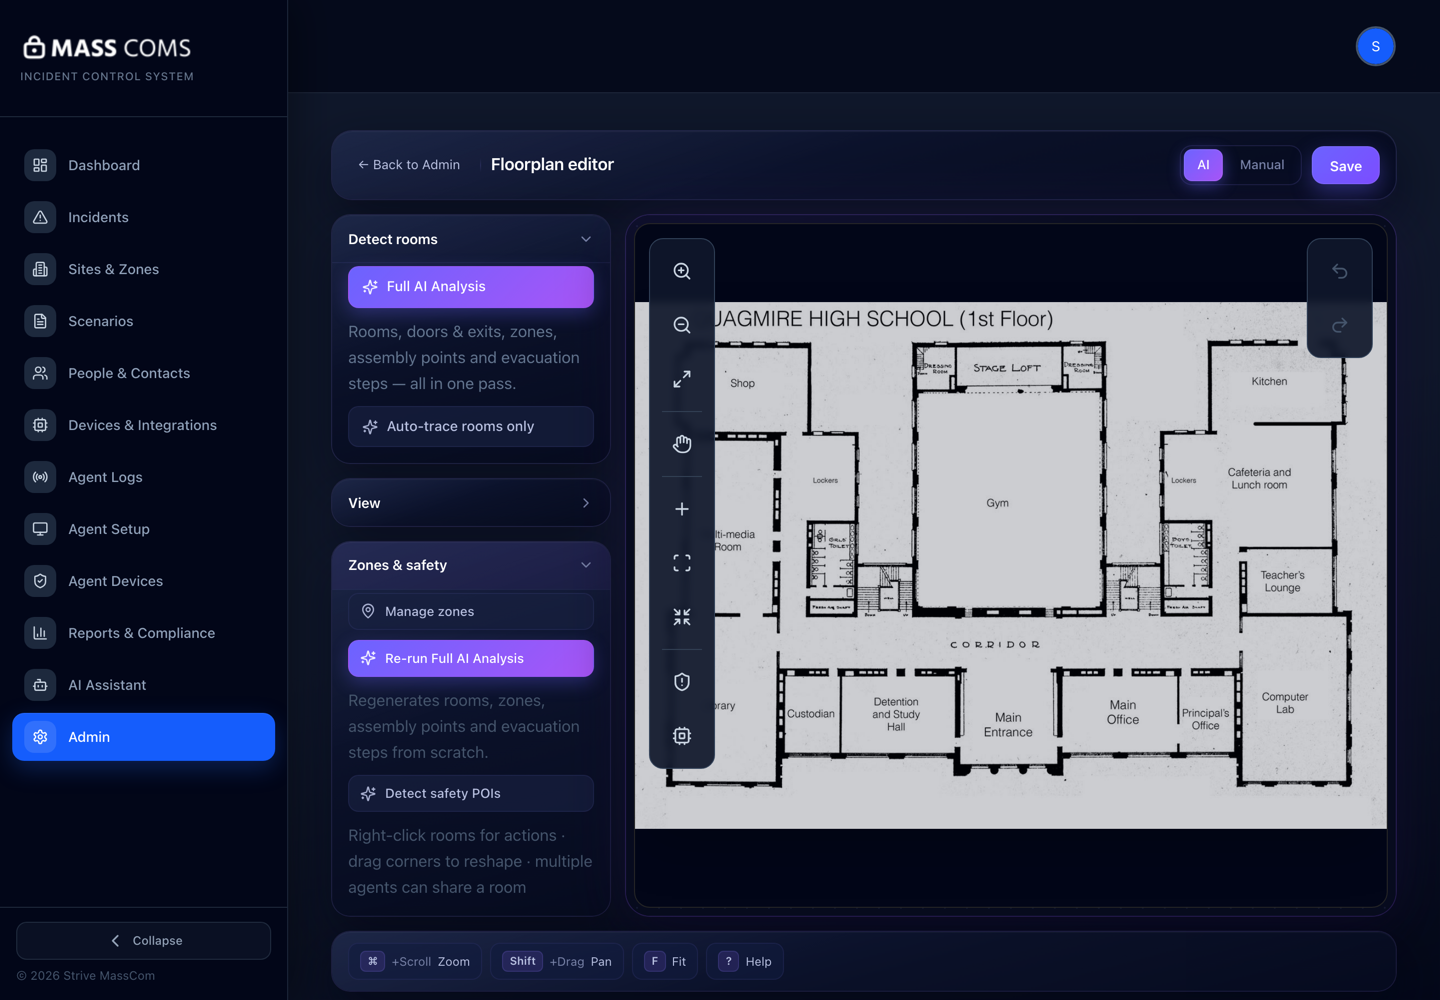
Zones & safety panelMassComs floorplan editor Zones and safety panel showing Manage zones, Re-run Full AI Analysis and Detect safety POIs. - 10
Save, and treat saving as versioning
Save floor plan writes rooms, boundary, doors, zones, assembly points and device overlays together. Saved plans appear in the saved-plans list and can be reopened later; you do not have to finish in one session.
Because a save replaces the working state for that floor, do the risky experiments before a save rather than after. Undo and redo are available while you work (⌘Z and ⌘⇧Z), with a history of the last 50 actions — but history does not survive leaving the page.
Confirm it workedAfter saving you should see Latest changes saved, with a link through to Sites.
- 11
Have a person verify it against the real building
Preview routes from several representative rooms — one adjacent to an exit, one deep inside the floor, one behind a door you are unsure about — and walk the doubtful ones.
This step is the one that cannot be automated and the one most often skipped. A plan is finished when a competent person says the routes are walkable, not when the builder stops reporting problems.
Troubleshooting
When it does not go to plan.
| Symptom | Usual cause | Fix |
|---|---|---|
| The auto-trace produces almost nothing. | Faint, dashed or hatched walls, a photographed source, or a plan whose contrast is destroyed by the downscale to 2048 pixels. | Re-export from the original at higher contrast and resolution. If the source cannot be improved, switch to Manual Mode and draw the rooms. |
| Rooms overlap in a straight line across the plan. | A tile seam — two adjacent tiles each claimed the same space. | Run Fix overlaps, then re-check the corridors that cross that line. |
| The legend or title block was traced as a room. | It was inside the uploaded image and looks like a bounded rectangle. | Delete those rooms, and crop them out of the source before re-uploading if you trace this plan again. |
| No doors appear after tracing. | Auto-trace rooms only does not run door detection. | Run Full AI Analysis, or add doors by hand with Add doors. |
| Full AI Analysis says it finished but there are still no doors. | The door pass runs on after the pipeline reports done, and fails quietly if it cannot complete. | Wait until the Zones & safety panel stops showing Detecting doors and exits…, then re-check. If doors never arrive, place them by hand — a floor with hand-placed doors routes correctly. |
| AI Mode buttons are disabled. | No image has been uploaded, an analysis is already running, or the organisation is in demo mode. | Upload a plan first. Auto-trace is disabled in demo mode by design — use a real organisation to trace. |
| Undo stops working part way back. | The history keeps the last 50 actions only, and does not survive a page reload. | Save more often. Save is the reliable checkpoint, not undo. |
Good to know
Small details that prevent big confusion.
- A visually neat line is not proof that a route is safe.
- Re-verify after building works, a refurbishment or a plan replacement — nothing re-checks it for you.
- Import JSON lets you rebuild a previously traced floor without re-tracing it.
- The plan you upload is a published artefact. Strip sensitive annotations before, not after.
Was this guide clear?