
Auto-trace is the difference between an afternoon and a fortnight when you are onboarding an estate. It is also the feature most likely to produce confident, wrong output. This guide explains the mechanism so you can review the result with the right suspicion.
Before you start
Have these ready.
- A floor with an uploaded plan in the builder.
- AI Mode selected — auto-trace is unavailable in Manual Mode and in demo mode.
- 01
Understand what the trace is given
Before analysis, the uploaded image is downscaled so its longest edge is 2048 pixels and re-encoded as JPEG. The trace never sees your original resolution.
This is the most useful thing to know about the feature. If you can no longer read the room labels after downscaling to 2048 pixels, neither can the trace — and it will fall back to geometry alone, producing correctly shaped rooms with no names.
- 02
Understand tiling
The plan is split into tiles and each tile is analysed independently, then results are mapped back into full-image coordinates and stitched. Failed tiles are retried with a short stagger before the results are assembled.
Where the computer-vision service is reachable, the builder first extracts the drawing's geometry and generates tile boundaries from it, so tiles follow the building rather than an arbitrary grid. If that service is unavailable it falls back to fixed tile bounds and logs the fallback — the trace still runs, but seam artefacts are more likely.
Understanding this predicts where errors will be: at tile edges. Long corridors and rooms that straddle a seam are the ones to inspect first.
- 03
Run the trace and read the confidence badges
Auto-trace rooms only runs the room pass and nothing else. When it completes, rooms carry confidence badges — toggled under View → Confidence badges — indicating how sure the trace was.
Review in confidence order, not in reading order. The low-confidence rooms are where your time is worth most, and they are frequently the small, oddly shaped or unlabelled spaces that matter operationally — plant rooms, stores, stairwell lobbies.
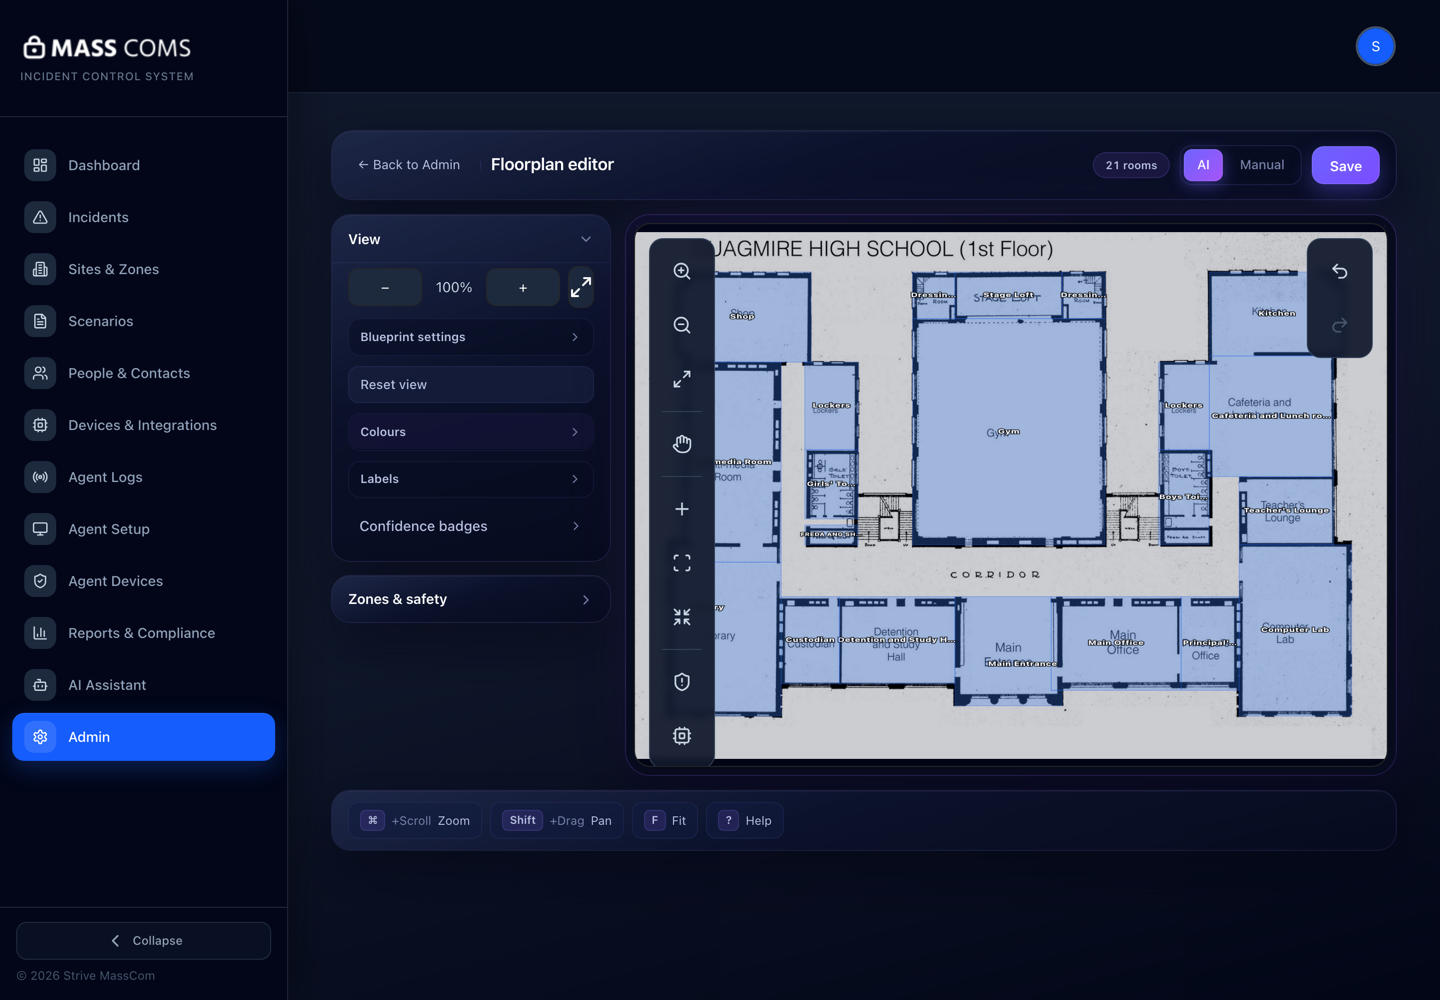
Traced plan with detected roomsMassComs floorplan editor after auto-trace, showing detected rooms shaded over the plan with a room count badge. - 04
Apply Fix overlaps before anything else
Fix overlaps clips rooms so no two overlap and removes duplicates. Run it before assigning zones or placing devices, because both of those attach to rooms that this step may delete or reshape.
Assigning devices to rooms and then running Fix overlaps can leave devices attached to a room that no longer has the shape you placed them in.
- 05
Apply Fill gaps, then check continuity
Fill gaps closes small holes between adjacent rooms. Gaps are dangerous precisely because they are invisible at normal zoom but break the adjacency that routing walks along.
Confirm it workedUse the Adjacent rooms view to confirm that rooms you know connect are shown as connected. A missing adjacency here becomes an impossible route later.
- 06
Name what could not be named
Name unnamed rooms resolves the rooms the trace produced without a label. Use the names people actually say, and add a location label where the plan's identifier and the spoken name differ.
The Location label field overrides the "You are in …" text — for example, showing Main corridor, by 01.031 instead of a bare room code.
- 07
Use Suggest zones as a proposal, not a result
Suggest zones groups rooms into candidate zones. The output is explicitly labelled AI suggested zones — review before applying.
Suggested zones are drawn from the shape of the building. Your zones should be drawn from your response procedure. Those two things agree often enough to be a useful starting point and differ often enough that applying suggestions unread is a mistake.
Applying suggested zones over an existing zone structure can reassign rooms you had deliberately placed. Review the proposal before you accept it.
- 08
Decide whether to keep the trace
There is a point at which correcting a bad trace costs more than drawing the floor by hand. Judge it deliberately rather than by sunk cost.
- Keep it if most rooms are right and the wrong ones are identifiable — correcting a dozen rooms is fast.
- Discard it if room boundaries do not follow walls, or if corridors are fragmented across the whole plan.
- Discard it if you cannot tell which rooms are wrong. A trace you cannot audit is worse than no trace.
Troubleshooting
When it does not go to plan.
| Symptom | Usual cause | Fix |
|---|---|---|
| The trace names rooms that do not exist. | Text elsewhere on the drawing — a legend, a schedule, a revision block — was read as a room label. | Delete those rooms and crop the source before re-tracing. |
| Detection succeeds on some tiles and fails on others. | Transient failures; the builder retries failed tiles automatically but retries can also fail. | Re-run the auto-trace. If the same region fails repeatedly, that part of the drawing is the problem, not the request. |
| Room shapes are right but every room is unnamed. | Labels were unreadable after downscaling. | Re-export the source larger and cleaner, or accept the geometry and use Name unnamed rooms. |
Good to know
Small details that prevent big confusion.
- Auto-trace is disabled in demo mode. Use a real organisation to evaluate it.
- Errors cluster at tile seams. Inspect corridors and long rooms first.
- The trace is a labour saver, not an authority. Nothing it produces has been checked against the building.
Was this guide clear?