
Rooms alone are a picture. Doors are what make them a graph. Until a floor has doors and at least one final exit, MassComs cannot compute a route across it — and a route that reaches the wrong door is worse than no route at all.
MassComs supports your organisation’s safety plan. It does not replace authorised instructions, trained judgement or emergency services.
Before you start
Have these ready.
- A traced floor with rooms corrected — overlaps fixed and gaps filled.
- Knowledge of which doors are real fire exits under your fire strategy, not just doors to outside.
- 01
Run door detection, or place doors by hand
Door and exit detection is a separate pass from room tracing. It runs as part of Full AI Analysis and is not triggered by the room trace on its own. If you only traced rooms, you have no doors.
Detected doors appear marked as such. As with rooms, treat them as proposals: a detected door in a wall that is actually a window changes a route in a way that matters.
Door detection is deliberately non-blocking. The full analysis reports itself finished once rooms, boundary and zones are done, while the door pass keeps running in the background — the Zones & safety panel goes on showing Detecting doors and exits… after the rest has settled. Give it time before concluding that no doors were found.
Field or control What it does Add doors Places an ordinary internal door connecting two spaces. Add exit door Marks a door as a way out of the building. Fire exit The stronger designation — a final exit that evacuation routes should terminate at. Staircase entrance The point at which a route leaves this floor. Required for any multi-floor routing. Detected door A door proposed by detection rather than placed by a person. Review these individually. 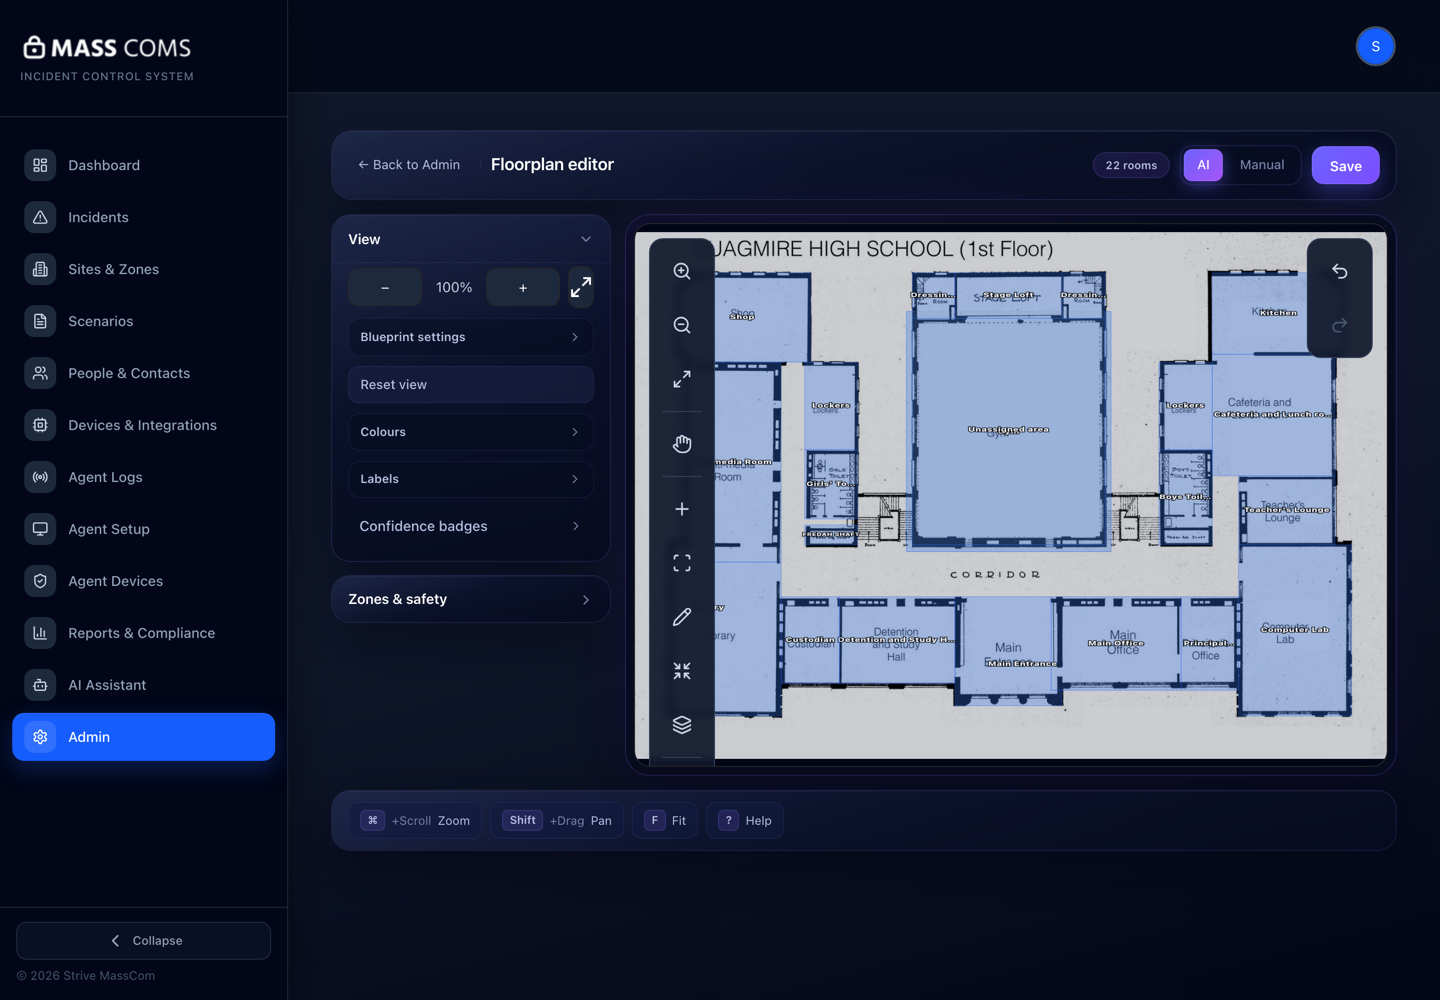
A plan after full analysisMassComs floorplan editor after a full AI analysis, showing detected rooms and the safety tools in the canvas rail. - 02
Connect the rooms that actually connect
Every doorway that people use should exist as a connection. Missing doors produce routes that go the long way round; invented doors produce routes through walls.
- Walk the plan mentally room by room and ask: can I get from here to the corridor?
- Pay attention to double doors, lobbies and airlocks — these are frequently traced as one space and missed.
- Doors that are locked in normal use but released on alarm still count as connections. Doors that stay locked do not.
A door that is normally locked and not released by the fire system must not be marked as an exit. A route to a locked door is the most dangerous single error you can make in this builder.
- 03
Mark final exits correctly
Distinguish between a door to outside and a designated fire exit. Routes should terminate at fire exits; other external doors may be convenient in daily use and unsuitable in an evacuation.
Confirm it workedEvery zone on the floor should have at least one fire exit reachable from every room in it. Preview a route from the room furthest from any exit to confirm.
- 04
Configure staircases for multi-floor routing
Place a staircase entrance on each floor the staircase serves, then use Configure staircase to link them. The dialog asks for a Staircase name and offers This is (pick an existing staircase) so the same physical stair on another floor is recognised as the same stair.
This linkage is what makes a route on the second floor able to say "take stair B down" and have the ground-floor leg continue from the right place. Without it, each floor's routing is an island.
Field or control What it does Staircase name Use the name on the building's own signage. It is read by people who are moving. This is (pick an existing staircase) Links this floor's entrance to the same staircase already defined on another floor. Arrives at assembly point Where the staircase route ends up once it reaches the ground. - 05
Set the evacuation strategy per room
Rooms carry an Evacuate via setting for multi-floor routing, with two options: Direct to assembly point (ground floor) for rooms already at ground level, and Via staircase (upper floors) for rooms that must descend first.
Getting this wrong on a ground-floor room sends people to a staircase they do not need. Getting it wrong on an upper floor produces a route that walks into a wall.
Confirm it workedSpot-check one room per floor per staircase. If the previewed route descends the stair you expect and arrives at the right assembly point, the linkage is correct.
- 06
Preview routes and walk the doubtful ones
Preview from several rooms per floor. Choose deliberately: the room furthest from an exit, a room behind a door you were unsure about, and a room on the top floor that must use a staircase.
Walk any route you would not personally be confident following in smoke. That is the standard, not whether the line looks plausible.
Troubleshooting
When it does not go to plan.
| Symptom | Usual cause | Fix |
|---|---|---|
| A route terminates in the middle of the floor. | No fire exit is reachable from that room — a door connection is missing somewhere along the way. | Use Adjacent rooms to find where the chain breaks, add the missing door, and preview again. |
| A route sends upper-floor occupants to a door on their own floor. | The room's Evacuate via setting is Direct to assembly point rather than Via staircase. | Change the setting for that room, or for the whole floor if the pattern repeats. |
| The staircase route restarts rather than continuing on the floor below. | The staircase entrances on the two floors were never linked as the same staircase. | Open Configure staircase on the lower floor and use This is (pick an existing staircase) to link it. |
| A detected door is in a window. | Detection misread an opening in the drawing. | Delete it. Detected doors are proposals and deleting one has no side effects. |
Good to know
Small details that prevent big confusion.
- Doors are the highest-value thing in the builder and the easiest to under-invest in.
- Fire strategy decides what counts as a final exit. If you are not sure, ask the person who owns the fire risk assessment — do not infer it from the plan.
- Re-check staircase links after any plan replacement. Links reference the geometry you replaced.
Was this guide clear?