
Pairing is short. Naming and locating the screen properly is what decides whether it is useful during an incident, so do not stop at the point where content appears.
Before you start
Have these ready.
- A display with the MassComs signage player installed and online.
- The devices.manage permission on the dashboard.
- A decision about where this screen sits in the site structure.
- 01
Start the player and read the pairing code
Open the signage player on the display. An unpaired player shows a pairing code on screen.
If no code appears, the player has no network. Fix connectivity before anything else — a paired screen with no network is worse than an unpaired one, because it looks fine on the wall.
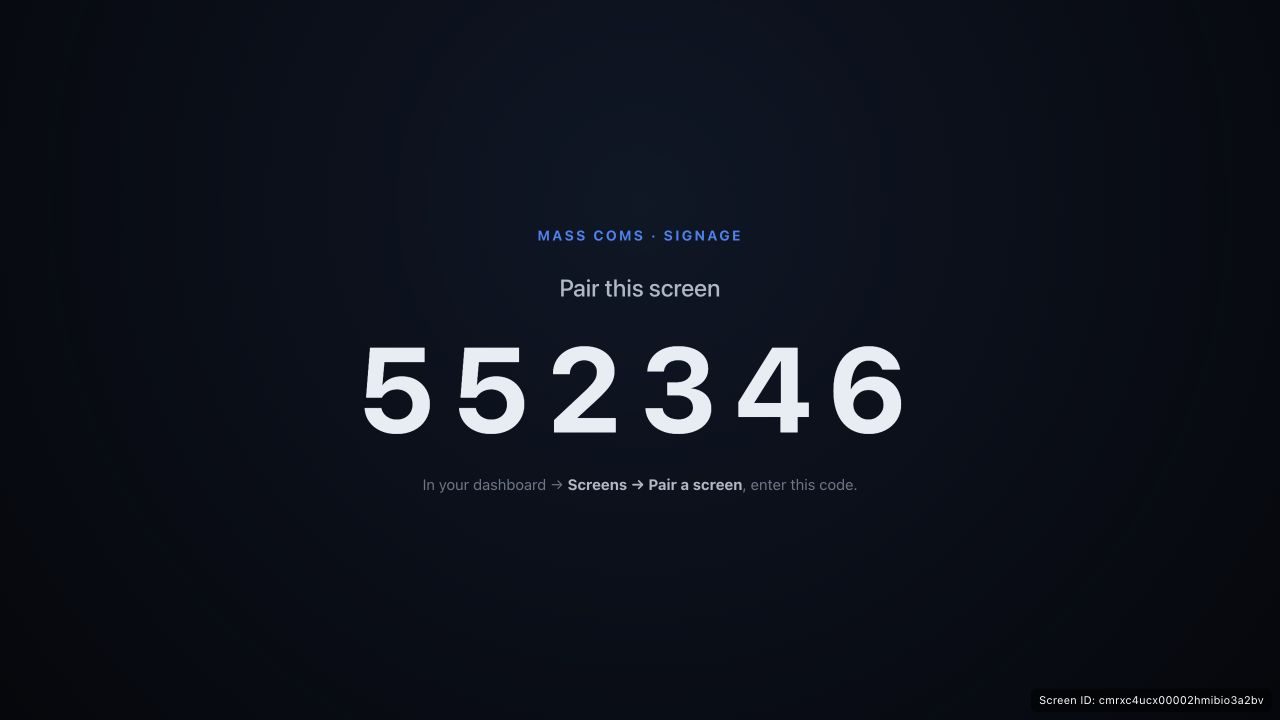
Player pairing codeMassComs signage player showing its pairing code on screen. - 02
Claim the screen in the dashboard
Open Screens in the signage dashboard and add a screen using the code from the display.
Confirm it workedThe player leaves the pairing screen within a few seconds of the code being accepted.
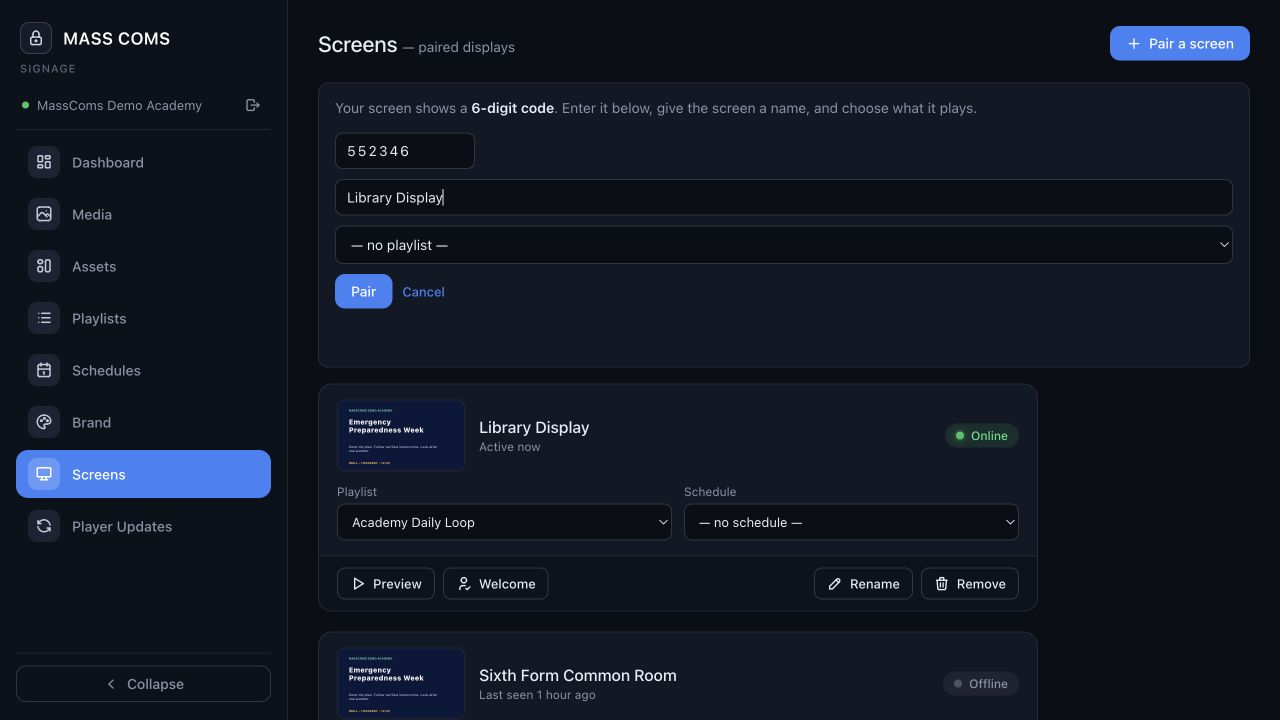
Screen pairing dialogMassComs signage screen pairing dialog in the dashboard. - 03
Name and locate the screen
Give it a name someone unfamiliar would recognise — Reception, Main Hall, Sixth Form Corridor — and set its location in the site structure.
The name is what you will pick from a list during an incident, possibly under pressure. Foyer screen is a useful name; Screen 4 is not.
A screen with no location cannot be zone-targeted. It will receive organisation-wide takeover and nothing narrower.
- 04
Place it on the floorplan and set which way it faces
Place the screen on the plan at its real position and set Screen faces to the direction a viewer is looking. This is what makes exit-route arrows correct from the viewer's point of view.
See Place devices on the floorplan.
- 05
Publish a test playlist
Assign a simple playlist and confirm it appears. This proves the content path, which is separate from the emergency path.
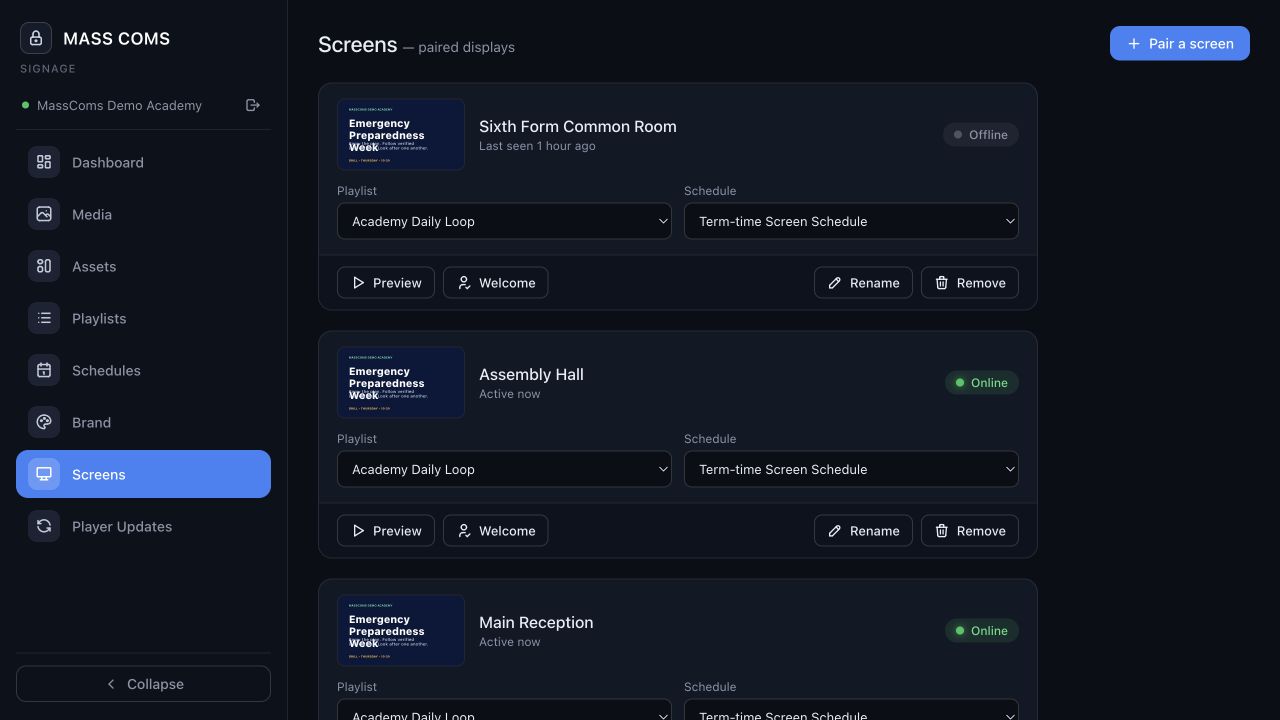
Screens overviewMassComs signage screens overview showing paired screens and status. - 06
Check the signage relay is provisioned
Emergency takeover reaches screens through the signage relay. The Emergency delivery panel at the top of Agent Setup reports Signage relay — Not provisioned until Provision Signage has been run, and states the consequence plainly: screens will not receive emergency takeovers.
A screen can be paired, named, located and showing content perfectly while still being unable to receive an emergency takeover. Check this panel, not the screen.
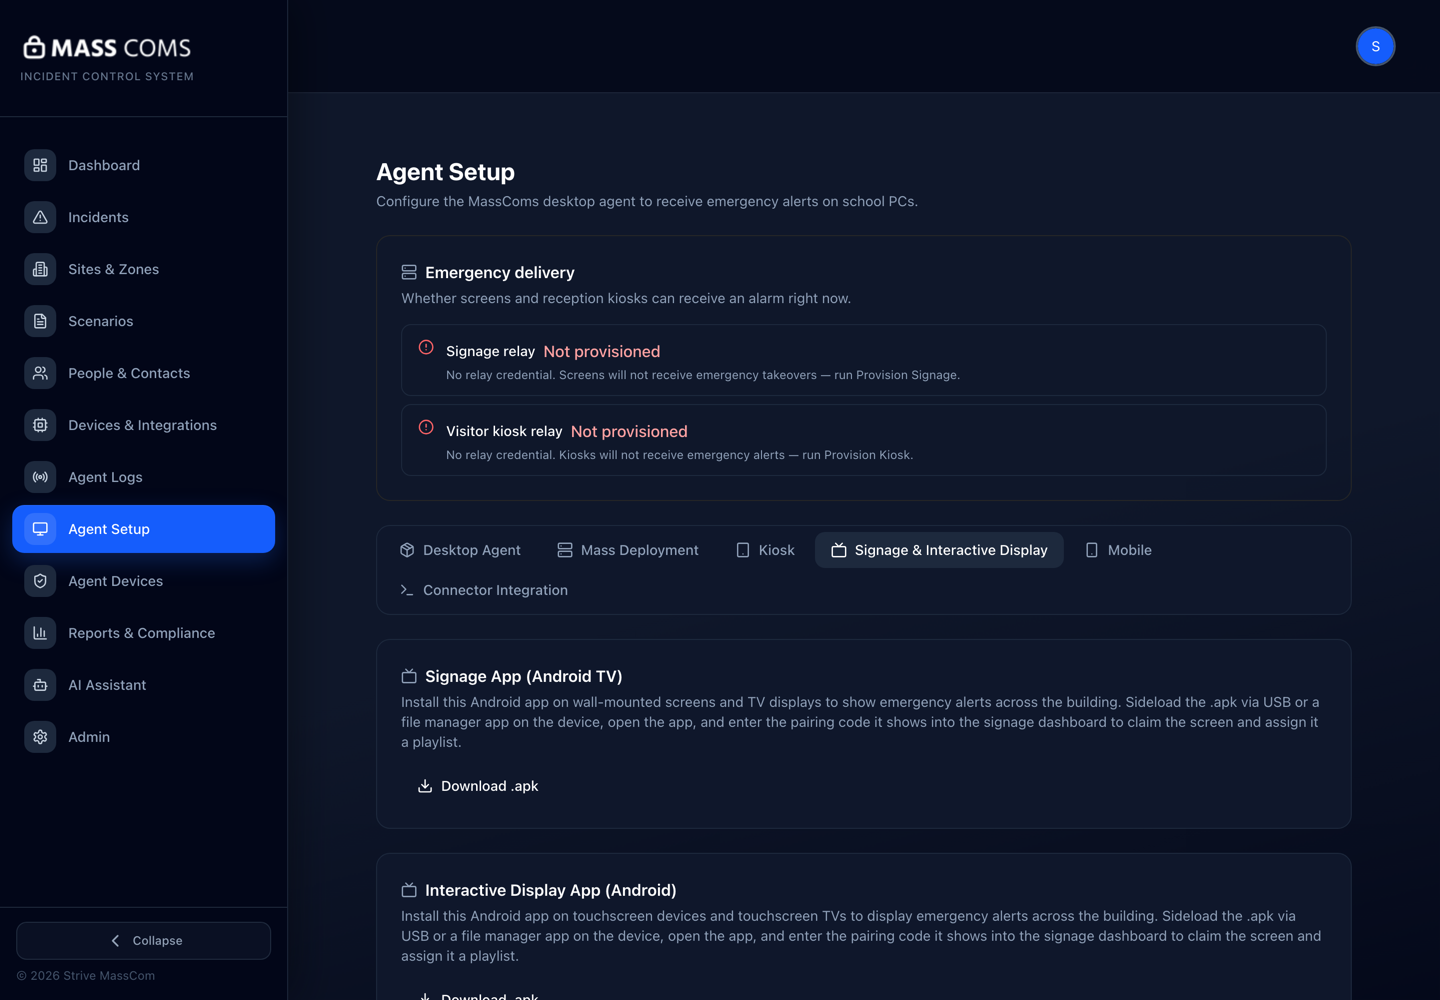
Signage provisioningMassComs Agent Setup Signage tab showing provisioning and emergency delivery status. - 07
Test emergency takeover
Run a TEST-type incident scoped to include this screen and confirm it takes over, then returns to its playlist on the all-clear.
Confirm it workedThe screen switches to takeover within seconds, and returns to scheduled content after the all-clear.
Troubleshooting
When it does not go to plan.
| Symptom | Usual cause | Fix |
|---|---|---|
| No pairing code on the display. | The player has no network connection. | Fix connectivity. The player cannot generate a claimable code offline. |
| The code is rejected. | It expired, or it was typed from a screen that has since regenerated it. | Restart the player to get a fresh code and claim it promptly. |
| Paired but showing nothing. | No playlist assigned, or the schedule has no active window. | Assign a playlist and check the schedule covers the current time. |
| Content shows but takeover does not. | The screen has no location, or its location is not in the targeted zone. | Set the location and check the zone membership of its room. |
Good to know
Small details that prevent big confusion.
- Content and emergency are separate paths. Testing one does not test the other.
- Name screens for humans under pressure, not for an inventory system.
- A screen in a corridor with no assigned room is common and is a real coverage gap.
Was this guide clear?